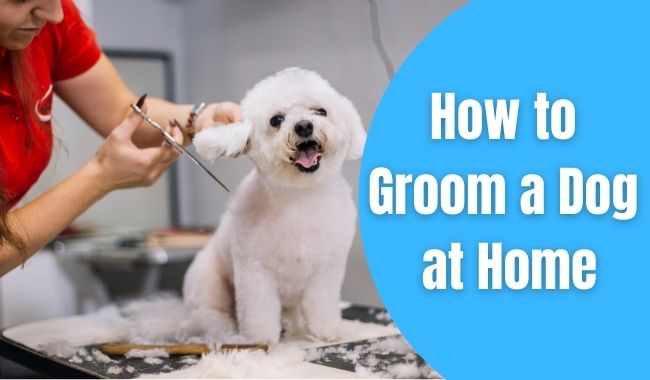
Groom a Dog at Home- Owning a dog doesn’t only involve playing, feeding, and keeping them alive. As a pet owner, you’ve got a lot of other responsibilities to take up too.
Grooming is a very important aspect of caring for a dog. It is something people often overlook, but it is in no way insignificant. In fact, an unkempt dog reflects poorly on the owner, so it’s very important to keep your dog well-groomed.
Why? Because grooming is both beneficial to your dog’s overall health and it’s great bonding activity too. Nobody wants an untidy and unclean dog. You’ve got to remember that dogs need good sanitary practices, just like us humans.
But don’t worry if you’re a new dog owner. Waghound has got your back. Keep reading to find out everything you need to know about grooming your dog.
Train your Dog to Cooperate During Grooming

Grooming is an extremely difficult task when you have a scared and uncooperative dog. This is why it’s important to get your dog used to your touch and being held and moved around from an early age.
Dogs aren’t very comfortable with being touched on their face, tail, bottom, and the top of their head. Move on to these parts only when your dog is fully comfortable with being handled.
1. Familiarizing your Dog to Touch
Get your dog used to your touch when they are little. The plan is to let your dog associate positive experiences like cuddles, pats, treats, and belly rubs with your hands.
You can start by letting your dog sniff your hand. Then, whenever your dog starts sniffing, praise them or say “yes”. Continue doing this for a week, at least three to four times a day.
Once your dog gets used to your hand, you can start patting their chin and back. Use the same method of training as before. Take advantage of the times your dog sleeps next to you. Give them belly rubs and try to make them feel more relaxed.
The last step of handling is to get your dog accustomed to having a hand on their foot while another hand rests on their leg. These will be useful when grooming your dog.
2. Easing your Dog into Being Held
Dogs don’t enjoy being contained for long. You’ll have to get them used to be held for long periods of time with restricted movement.
First of all, sit beside your puppy and place your hands on each of their ribs. This should just be a gentle touch and not a grasp. Your puppy might wriggle away at first, but they will soon learn to relax. You have to continue doing this every day, for a few seconds before letting them go.
As soon as they move, give them a treat, or a toy. Then, gradually increase the hold time. You’ve got to be very careful about the whole process and go at a comfortable pace.
If your dog is becoming too distressed, stop and try again later. Observe your dog closely and never force your dog to be held if they’re very uncomfortable with it.
3. Accustoming your Dog to Restraint
Once your dog is okay with being touched and held, you can move on to the next step.
Start by holding your puppy gently. This is easier if your puppy is on your lap. Remember not to be too firm or put too much pressure on them.
It’s normal for your puppy to wriggle about. When they do this, you can relax your hold on them even more. However, don’t let them go during the wriggling. If your puppy won’t stop trying to get out, then they probably aren’t okay with being held yet. So, you’ll have to practice the previous step for a few more days.
If your puppy ends up relaxing or even does something like sighing or licking its lips, release them. Then, give them a treat or toy or play a game with them. This will show your puppy that relaxing is the key to being released.
4. Controlling your Dog’s Movement
You’ve got to teach your dog that you can move their limbs without hurting them. This is best done when they’re lying next to you
Start off with their legs. Move one leg forward and backward gently and continue with the others.
Do the same for the head, ears, paws, and tail. You should also touch their toes and nails and observe their reaction. Give your dog a treat and a praise every time they allow you to do this.
If all the previous steps have been mastered, your dog should be okay with being moved around.
How to Bathe a Dog at home

Just like for humans, baths are an important part of the canine grooming process. Although you can use wet wipes to clean your dog more frequently, nothing works as well as a bath.
How Often Should you Bathe your Dog?
Well, there really isn’t a one-size-fits-all answer for this. Your dog’s bathing schedule depends on what breed they are, their medical conditions, and what activities they get up to. Some dogs may need monthly baths, while others may only need a yearly one.
Daily baths aren’t healthy because this can dry out your dog’s skin and strip away their natural oils. However, if your dog starts getting stinky and gets into a messy situation, you should definitely give them a bath. Dirt and mud accumulating in your dog’s hair can result in dog fleas.
All About Bathing Products
When grooming your dog, you should never use your own bathing products. Dogs have a very specific pH and sensitive skin that’s not suited to human shampoos and conditioners.
Luckily, there are plenty of canine shampoos on the market, suited to different breeds and even different medical conditions. Don’t skip out on the conditioner because that will keep your dog’s hair well-groomed and shiny.
Gentle hypoallergenic shampoos and conditioners are generally recommended. Your dog’s other bathroom products should be chemical-free and mild. Otherwise, it may cause skin irritations or allergies.
Don’t ever use a large amount of new product on your dog without testing it first. The best thing to do is to try out a bit of the product on your dog’s paws to check for any adverse reactions.
The Bathing Location Matters
Where you bath your dog depends on your dog’s size and your level of comfort. You can bathe your dog in your yard, in the bathroom, or even in the kitchen sink.
If you’ve got a small breed dog, sinks are a better option. Tubs are so big, they might overwhelm them. Medium-sized dogs are okay with a bathtub, but it’s wiser to bathe them in the yard if you own a very large dog.
Preparing for Your Dog’s Bath
Here are some things you should do before you bathe your dog:
The Right Conditions
Check the temperature of the water. It should always be lukewarm. You want your dog to be as comfortable as possible and not freeze or burn.
If you’re using a hand shower or a hose, make sure it’s at low pressure. You don’t want to freak your dog out. Your dog will also most likely be moving around a lot, and any hard sprays will just create a mess.
1. Bath Tub Precautions
When you’re using a bathtub, make sure to place a rubber mat on the floor of the bath. This will prevent your dog from slipping and make them feel more relaxed. Remember to place one next to the tub as well, for when your dog gets out.
2. Make Everything Accessible
Make sure you have all the bath products to hand. Keep numerous towels in a dry place nearby. You’re also going to be needing some treats and toys at hand to get your dog to behave.
Remember, when you’re giving your dog a bath, you won’t have time to look for anything. You’ll need to reach out blindly with one hand and fast! Or else, in the blink of a second, you could be splashed with water, and your dog might whizz out the door. Be prepared.
3. Getting Your Dog Ready for the Bath
Along with all the necessary preparations, you need to get your dog physically and mentally ready for the bath as well.
When dogs have too much energy, they’re more likely to move around and misbehave. An energetic dog will definitely be more difficult to control. A tired dog is more likely to cooperate. This is why taking your dog out for a walk before a bath is a good idea.
Let your dog explore the bathroom and the bathtub on their own. Introduce the towels and the hose slowly. Also, let them sniff the products you’ll use.
Make sure the environment is soothing and don’t make too much noise while getting everything ready. Remember, your dog will pick up on your body language when you’re tense. A calm owner is more likely to have a calm dog.
How to Give Your Dog a Bath
- Lure your dog to the bathing area with a toy or a treat. If your dog moves around a lot, it’s probably a good idea to put on a collar and a leash.
- Brush your dog’s hair and put some cotton balls into their ears. You don’t want water getting anywhere near your dog’s ears as it can cause an infection.
- Talk to your dog in a soothing voice and get them into the tub. Then, give them a treat and place some comforting toys in the bath with them.
- Start washing your dog’s fur thoroughly. In the case of a bathtub, you should definitely use a hand-held shower head. This is easier to control and move around.
- Gently rub the shampoo and then the conditioner on your dog’s fur. Afterward, rinse it all off properly. Rinse repeatedly to get rid of any residue, or your dog’s skin might get irritated.
Drying your Dog after the Bath
Once you’ve rinsed off your dog, give them a treat and praise them. Let your dog shake off any excess water.
Then, get your dog out of the tub and dry their coat with a towel. You could also use a canine dryer to remove any excess moisture. Dogs can catch colds very easily if they’re wet for too long.
Never use your own hair dryer because the heat can irritate their skin. You could also let your dog play in the sun for a little while and let nature do the job.
How to Take Care of Your Dog Hair at Home

For dogs to continue looking fabulous and well kept, they need an intensive hair care routine. This involves trimming and brushing their fur.
1. Cutting your Dog’s Hair
Longer-haired dogs and dogs with double coats need to be trimmed, especially during the summer, or they might overheat.
Even short-haired dogs need to be trimmed to make them feel lighter and to get rid of tangles and loose hair.
Types of Scissors or Clippers
Before you cut your dog’s hair, you must get the right type of scissors. For a general cut, opt for straight shears, but if it’s just to remove some layers, use a pair of curved scissors instead.
There are also a variety of dog grooming clippers available in the market to give your beloved pooch a clean and perfect cut. You can opt for those as well.
You should use scissors with round tips for more sensitive areas like the face and the tail. On the other hand, Thinning shears are more useful for cutting thin patches of hair.
Preparing for the Cut
The scissors should be well oiled and sharpened before use. Blunt scissors are more likely to hurt your dog as they won’t be efficient and will only pull on their hair.
If your dog is small, you can just place the discarded hair on a table during the cut. If your dog is larger, make sure to place a mat beneath your dog. This will make cleaning up afterward much easier.
First of all, brush your dog’s coat to make it even and smooth. Get rid of any tangles and mats by using a comb or by trimming it. Give your dog a bath or wipe down their coat with a washcloth to dampen the hair.
Introducing your Dog to Scissors or Clippers
Place the scissors beside your dog and shower them with praise. Let your dog feel the scissors or clippers by placing it gently on their paws. If your dog is calm, then give them a treat before removing it.
Once your dog is okay with the feel of the scissors, start snapping the scissors in front of your dog. This way, your dog will be familiarized with the snipping sound. This will be a little more difficult to train, but with positive reinforcement and treats, this too will work out.
After your dog gets used to the snipping sound, attempt to cut a bit of your dog’s fur with it. Do it very slowly and watch for your dog’s reaction.
If your dog moves away, stop what you’re doing and never force it. But make sure to give your dog a treat when they calm down or relax their muscles, even for a second.
How to trim your Dog’s Hair
Use your fingers to measure how much of the hair you want to cut. Make sure you can hold up and see how much of the hair you are cutting. Don’t risk cutting too close to the skin.
Grab the hair with a comb in small sections and begin cutting from the front side to the back. You should use the straight shears at first on the neck and then move down towards the tail. Then comes the trimming of the belly and leg hair.
Remember to be very gentle but firm throughout the whole process. If you have a dog with denser hair, this is where your thinning shears will come in handy. Going over the cut with curved scissors will feather the cut out a bit. You can cut the more sensitive areas like the face at the end.
2. Brushing your Dog’s Hair
Brushing will keep your dog’s fur soft, glossy and healthy. It distributes the natural oils in the skin and gets rid of any tangles and accumulated dirt.
If you don’t brush your dog, it will look unkempt. Your dog will also be susceptible to irritation and skin infections. What’s more, regular brushing can greatly reduce any annoying hair shedding.
General Brushing Rules
The amount of brushing required depends on your dog’s breed, their coat, length, shedding as well as their activities. Long-haired dogs generally need more brushing than short-haired dogs.
Here are a few general brushing guidelines, according to each dog’s coat type:
- Dogs with short and thick fur can be brushed every one to two weeks.
- For the dogs with short hair and smooth coats need to be brushed once every two to three weeks.
- And dogs with longer hair or those that have undercoats need to be brushed every week.
Introducing Your Dog to the Brush
Once your dog is used to being touched and held, you should get them used to the brush. As soon as you introduce the brush, give your dog a treat and praise them. Then move the brush away, out of sight. Continue placing the brush next to your dog and rewarding them for staying calm.
After your dog is used to the feel and presence of the brush, you can begin stroking them gently with the brush. Whenever you do so, make sure to encourage your dog and give them a treat, making it a pleasant experience.
Don’t brush problematic areas at first. Start off with the chest and back, where your dog likes being touched the most. Gradually you can increase the brushing for a longer time and to more sensitive parts of their body.
How to Brush Your Dog’s Hair
Once your dog is used to the feel of the brush, you can start grooming your dog regularly. Start with the head and then move down to the neck, back, and tail. Brush in one direction, in the direction the hair grows. Get rid of any loose hair first.
Make sure the brushing is comforting and not painful. Later you can change the brushing to the direction opposite from which the hair grows. This will be the most efficient way to check for fleas.
If your dog squirms, stop and continue another time. There’s no point in forcing your dog to be groomed, or it will associate negative feelings with the process. Make sure that you give your dog treats and speak in a soothing and encouraging voice.
Dealing with Mats and Tangles
If you see mats or tangles in your dog’s fur, apply some conditioner or mat spray on the spots. You should only brush the fur after this has been applied or you risk hurting your dog. You could also trim away any mats and tangles if it’s easier. Whatever you do, never pull at your dog’s hair.
3. Type of Brushes to Use
There are several types of canine brushes on the market that you can use. Here’s a description of the four main types:
Slicker Brushes
These are recommended for medium to long-haired dogs or curly-haired dogs. They are ideal for getting rid of external tangles and mats.
Always pick a slicker brush with a flexible handle that is easy to control. You need to be extra gentle with this brush as even slight pressure with this brush can hurt your dog.
Rakes
These brushes are meant for thick-haired dogs with undercoats. They can dig deep and get rid of tangles and mats in the undercoat, near the skin.
Pay attention to the length of the pins when choosing this brush. The pins of a rake should be the same height as your dog’s hair. Pins that are too short won’t be efficient, while pins that are too long will be uncomfortable for your dog.
Bristle Brushes
Bristle brushes are for dogs with short hair and smooth coats. They are ideal for dogs that frequently shed as the bristles get rid of any loose hair.
Pin Brushes
Pin brushes look a lot like human brushes. Although they aren’t very efficient for proper grooming, they’re usually recommended for the final touches.
How to Take Care of Your Dog’s Paw, Ear, Eye, & Teeth

Grooming doesn’t just start and end at bathing and brushing. Your dog’s other body parts like their eyes, ears, teeth, and paws need maintenance as well.
1. How to Clean Dog Ears at Home:
It’s advisable to clean your dog’s ears once every two to four weeks with a good quality ear cleaner.
How often you should clean your dog’s ears depends on their breed as certain breeds are more prone to ear infections. Dogs that generate more ear wax or have longer ears need their ears cleaned more frequently.
Even certain activities like swimming or trekking in the dirt can call for an ear cleaning session.
How to Clean Your Dog’s Ears
- First of all, brush away as much hair from your dog’s ears as possible. If there’s a lot of hair growing in your dog’s ears, you should seek a professional to trim or remove it.
- Pour a few drops of canine ear solution into your dog’s ear. Handle the ear very gently and give it a message. Do the same in the other ear as well, and let your dog shake it off.
- You can then use a cotton ball dipped in baby oil to wipe away the wax on the outer ear.
2. How to Care for your Dog’s Eyes:
Trim away the hair surrounding your pet’s eyes, but make sure to use blunt scissors. Hair in the eyes can be very uncomfortable.
Dogs often tend to get mucus around their eyes, which should be cleaned daily with a special canine eyewash. You can also get rid of your dog’s tear stains by using tear stain removers.
Leaving tear stains and mucus around the eyes can lead to bacterial infections.
Don’t let your dog keep their head out of the window when you’re driving too much either. Although it’s a fun experience for your dog, it’s not very good for their eyes. Dust and unknown materials can fly into your dog’s eyes, making them itchy and causing infections.
Check your dog’s eyes regularly. If you see any unusual discharge, redness, twitching or if your dog is squinting a lot, you should consult a vet immediately.
3. How to Take Care of Dog Paws:
A dog’s paws should be regularly checked for injuries or splinters. Since the paws are the parts of the body that are used the most and on all sorts of surfaces, they are more likely to get damaged.
Your dog might not be able to tell you, but you’ll understand when something is wrong if they are limping or whining in pain.
In some dogs, hair grows around their paw pads, which may cause difficulty when they are walking. A lot of dirt, debris, and tiny stones can get stuck in that hair as well, causing infections or pain.
So, make sure to trim down the hair on your dog’s foot pads regularly.
4. How to Cut Dog Nails:
Generally speaking, canine nails should be trimmed every two to four weeks. But there’s not really a specific nail trimming time. You’ll know when you should get the clippers out if you start hearing clicking noises whenever your dog walks on hard surfaces.
Long nails are actually very harmful to your dog. They mess up their balance and can be quite painful as well. Long nails will also lead to scratch marks on your floors and furniture.
Introducing your Dog to Nail Clippers
The first time you show your dog the nail clippers, ensure that it is a positive experience for your dog. Give them a treat and praise them a lot before hiding the clippers away. Your dog should believe that when the Clippers are in sight, good things will happen.
After your dog is familiar with seeing the scissors, it’s time to let them feel the clippers. Lightly touch your dog’s paws with the Clippers, one at a time. If your dog stays calm, give them an extra special treat like a spoon of peanut butter. Then gradually move on to gliding the clipper across your dog’s legs.
Getting Used to the Pressure
When your dog is comfortable with the feel of the clippers, you can move on. Hold one of your dog’s’ paws and if they are relaxed, place a bit more pressure on their nails. Talk to your dog in an encouraging voice and give them treats throughout the process.
Continue this for as long as it takes for your dog to remain calm. Practice every day with short sessions.
Familiarize with Trimming
When your dog is comfortable with the previous steps, you can start familiarizing them to the process of trimming. Hold one of their paws and use your other hand to touch an object like a pencil to your dog’s paw.
Practice this with many objects using the same method of positive reinforcement. Finally, when your dog is used to the objects, you can practice this step with the nail clippers.
After this, you should familiarize your dog to the sound of the clipper. As soon as the sound stops, stop giving your dog treats.
When your dog is comfortable with these steps, you can move onto the final familiarization step. Make the clicking noise while they are near your dog’s paw. Give your dog a treat while the noise is being made.
Don’t force your dog into anything. If your dog panics, then stop immediately and try the next day again.
How to Trim Your Dog’s Nails
- Get someone to hold your dog’s feet gently and firmly.
- Use the clippers to cut a tiny bit of the edge of one of the nails.
- Praise your dog and give them a treat. Talk to them in a soothing voice the whole time.
- Continue cutting bits off the other nails if your dog doesn’t make a fuss.
Precautions
If your dog is making a fuss, take it slow. You can always opt for cutting a bit off each nail every day. Never force your dog or restrain them to trim their nails. This will only scare your dog and make them hate nail clipping sessions.
When you are cutting your dog’s nails, you should make sure you know where the quick is. This is basically the veins in your dog’s paws, which create a bloody mess when cut. This can also be very painful, which is why you should never cut your dog’s nails too short.
Stay on the safe side and go bit by bit. In clear nails, the pinkish area is where the quick is situated but it’s more difficult to identify the quick in darker nails.
If your dog’s nail is becoming spongier as you trim, it’s probably nearing the quick. So that’s when you should definitely stop cutting.
Damage Control
If you do happen to cut the quick, don’t panic. You should stop cutting and work on stopping the bleeding immediately.
Keep a clean cloth and water at hand to wipe away the blood. If you apply some styptic powder on the nail with some cotton balls, the bleeding should stop.
You can also use a nail cauterizer that uses heat to stop the bleeding.
5. How to Clean Dog Teeth at Home

Dental care is a very important part of taking care of your pet. In order to keep your dog’s teeth healthy and strong, you should brush them every day.
Brushing gets rid of plaque buildup and makes your dog’s breath smell better. Poorly cared for teeth often leads to decay. This will ultimately require removing the dog’s teeth, which is extremely painful.
Brushing is no easy feat, but it’s also not something you can ignore. Here’s how to do it:
Familiarizing your Dog to Toothpaste
- Get your dog to sit on your lap or somewhere you can hold them and keep them from moving around too much.
- Let your dog taste the toothpaste and sniff the tube.
- Squeeze a bit of toothpaste on your fingers and place it on your dog’s gums.
- Use your finger to run the toothpaste across the teeth and gums.
- Praise your dog and give them a treat afterward.
- Practice this every day for a week. These sessions should be very short lasting just one to two minutes at most.
Introducing Your Dog to the Toothbrush
- Once your dog is used to the toothpaste, you can introduce the brush.
- Begin by dipping the toothbrush in chicken stock or any other liquid your dog might like to taste.
- Place a bit of paste on the toothbrush and let your dog sniff and taste it.
- Once your dog is familiar with the feel of the toothbrush, you can then attempt to brush their teeth.
- Use the brush on their front teeth and brush slowly. How long you do this for depends on your dog’s reaction. If your dog starts fussing, don’t force it.
- Praise your dog and give them a treat for however long they bear it.
- Gradually increase the brushing time and number of teeth.
How to Brush Your Dog’s Teeth
When your dog is fully okay with the brush and the toothpaste and you touching their teeth, you can incorporate it into their daily routine. It’s best to start brushing as early as possible as older dogs are a bit more difficult to train.
Make sure to use a canine toothpaste and toothbrush. Human toothpaste is a big no because the fluoride can harm your dog. When brushing, the bristles should be at the margin of the gum.
Brush very gently. But make sure to get into all the nooks and crannies.
Other Methods of Dental Care
Although brushing should be done regularly, there are also a few other measures you could take. Give your dog dental chews and chew toys to ensure better breath and to get rid of plaque.
Giving your dog raw bones to chew on is also a good way to keep their teeth strong. Diet plays an important part in dental health. Dry food like kibble is generally better for your dog’s teeth. This is because soft wet food is more likely to get stuck on the teeth and cause decay.
Final Thoughts
Congratulations, you’ve finally reached the end of this guide! You’ve now learned all the knowledge about grooming your dog you’ll ever need.
Remember, grooming can be difficult, but it is a mandatory part of your dog’s routine. With enough training and patience, your dog will get used to the process and be a lot easier to groom.
Even if you’re finding it too strenuous, it’s no excuse to skip grooming. You can always take your dog to a professional for regular sessions. This might cost more, but it will save you time and keep your dog looking and feeling great.
A well-groomed dog is a healthy and happy dog!
